I’m an avid hiker who discovered hiking in the early days of COVID. Singapore has several hiking trails, but the views don’t quite change after the 30th time up Bukit Timah or going the laps around MacRitchie. So once borders swung open after COVID was declared over, I started exploring further afield.
Fast forward several years, and I found myself booked on a trip for a hike to Everest Base Camp. I actually considered going on this hike many times, but always managed to convince myself out of it, telling myself that I probably wouldn’t make it, or it would be too hard. That changed during a family gathering when everyone was talking about all their body aches and pains, and there and then I decided to do it while I’m still able to.
I’ve done a couple of trips with SoTravel, including the climb up Mt. Rinjani, and saw that they too offered a trip to Everest Base Camp (EBC). So after some research, I booked my trip with SoTravel.
Day 1 – Arrival in Kathmandu

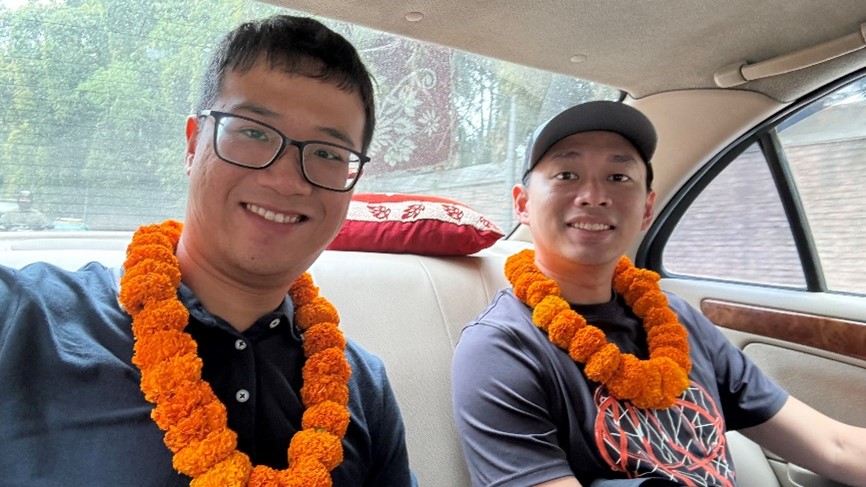
I flew in from Singapore to Nepal with my buddy, who I only met at the start of the trip. Landing at the Nepal International Airport, I was greeted by a sign welcoming us to the birthplace of Buddha. After sorting out the visa and customs, we were greeted by our friendly guide, Tulsi.
He brought us to our hotel, where we checked in and placed our bags, and then went out to get any equipment and gear needed for the long trek up and back down. We then squeezed in a quick tour around the historic old city of Kathmandu and met the rest of our group.
Since it was only the two of us, they merged us with another group that was off to summit Mount Lobuche. To get to Lobuche, they would need to take the same route as us via Everest Base Camp. So the plan for them was to complete the circuit to Everest Base Camp, and as we descended to head back to Kathmandu, they would then head to Lobuche Base Camp.
As we soaked up more culture during a cultural immersion dinner, we got to know each other and then headed back to the hotel.
Day 2-3 – The Wait
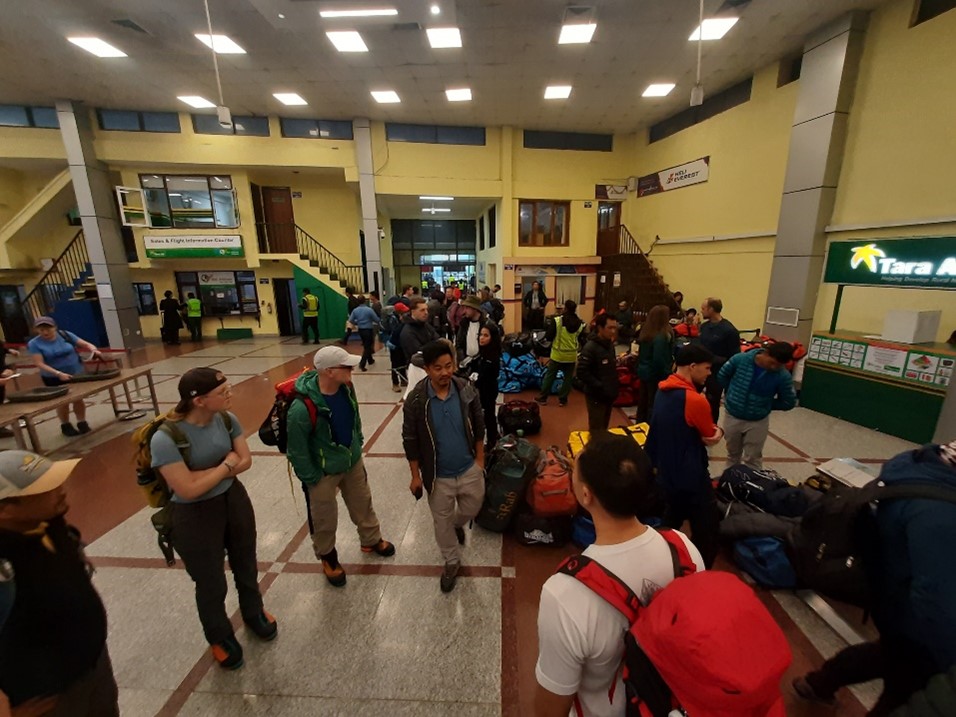
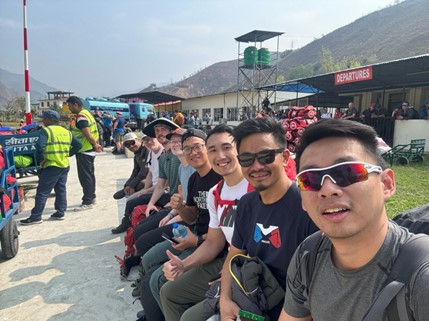
We began by heading to the domestic airport in the early morning. From there it was the start of a long three-day wait. On the first day, we waited at the domestic airport for half a day. Unfortunately, no flights were going out that day due to bad weather. So we took a minibus in the late afternoon and headed to a closer airport in Manthali. Since no flights were going out the rest of the day at that airport either, we stayed a night in Manthali.
The next day we waited at the Manthali airport, but once again, no flights were going out that day either. We shifted to a closer hostel and hoped that the next day we could finally fly out. There was some discussion of alternative trails if we still couldn’t get a flight the next day.


Fortunately, we did. The next day we flew out and finally landed at Lukla airport. Billed as the most dangerous airport in the world, it has a short runway that starts from a cliff edge and ends at a mountain face. The pilots, though, are well-trained, so there is nothing really to be afraid of.

Something that most vlogs or blogs don’t really go into detail about is the challenge of getting to Lukla airport. Since the plane is a small prop plane, the “Twin Otter”, flights depend on the wind and weather conditions, and the plane will need to fly over a high mountain. So, the weather must be clear at the departure airport, the way there, and the arrival airport. At any point, if the weather is not clear, all flights on that route will be called off by the authorities.

There is no alternative except to fly. The route there by road requires off-roading up dangerous uphill paths. If the weather is bad, mud slides and rock slides may happen. So, this is not for the faint of heart.
If you have not factored in possible delays, as the days tick down, you will have to call off the trip and choose alternate hiking trips. Do also note this might occur on the return flight. So the more buffer days you are able to give, the better.
Terrain Overview
- Lukla to Phakding: A gentle start with nice trails.
- Phakding to Namche Bazaar: A steeper ascent, introducing the first challenges of altitude.
- Namche Bazaar to Tengboche: A mix of flowing rivers and some icy patches, with temperatures starting to drop.
- Tengboche to Dingboche: The terrain gets colder and icier, making proper layering essential.
- Dingboche to Lobuche: Snowy terrain becomes the norm, with stunning views of Himalayan peaks.
- Lobuche to Gorakshep and EBC: The final push, featuring rocky terrain, scrambling, and the highest altitudes of the trek.
Day 4 – The Trek Begins – Lukla (2,800m) to Phakding (2,610m) and Namche Bazaar (3,440m)
After landing and meeting our porters, we finally begin the trek from Lukla to Phakding (2,610m). Traditionally we would have to stay a night at Phakding, but we decided to head to Namche Bazaar (3,440m) that day to make up for lost time if we wanted to make the flight back to Singapore in time.

The trek from Lukla to Phakding was nice and gentle. We stopped at Phakding for lunch, and then continued onward to Namche Bazaar. We were going at a pretty good pace and finally reached the Namche tea house late into the night. After a well-deserved dinner, we then turned in for the night.

The tea houses are generally quite spartan places. Don’t expect the comforts of a hotel as it’s generally meant for hikers to stay the night. There was generally no heating in the rooms except the dining area. Hot showers usually require payment and are heated either by solar panels or gas heaters. Attached toilets in your room are a rare luxury.
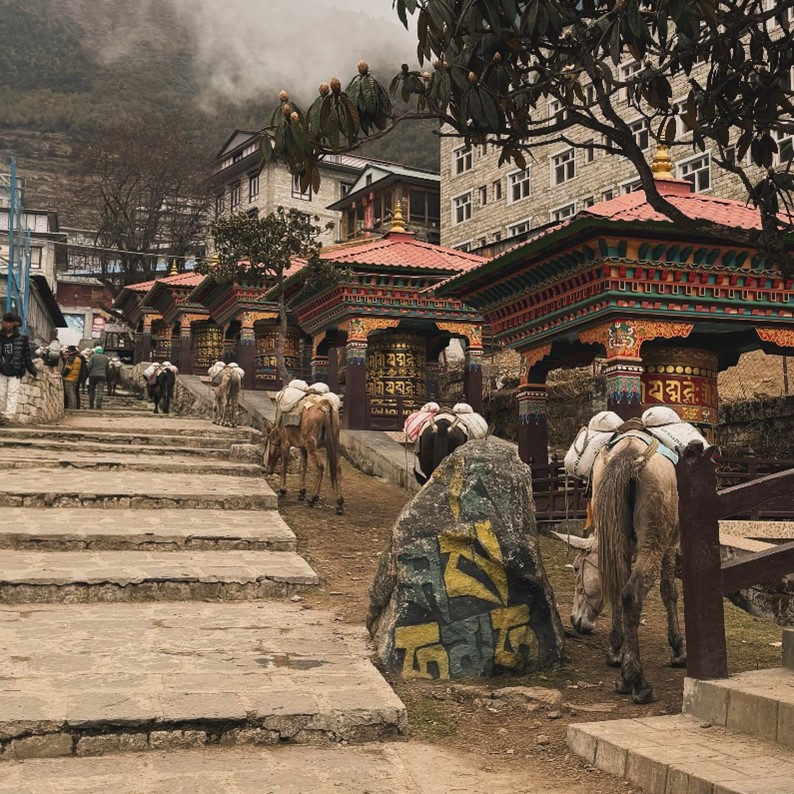
There are no roads and vehicles in the Nepalese part of the Himalayas. Every item you purchase and touch was brought up either by yak, helicopter, or a porter. So if you do forget anything and need to purchase it during the trek, prices will match the effort it took to get it up to that point. Don’t expect charging points in every tea house room. At higher altitudes, usually after Namche, you do need to pay for charging of devices.
Side note: The trek we took, from Lukla to Namche Bazaar in a single day, is very uncommon and can be problematic for some people who are more susceptible to altitude sickness. We were fortunate no one succumbed to it.
Day 5 – Shopping at Namche Bazaar – Namche Bazaar Acclimatisation (3,440m)

Today is acclimatization day. It’s important to acclimatise to the altitude. Some vloggers say it is okay to skip this day, but our guide felt it was necessary as we are Singaporeans and we live at sea level. Altitude sickness can get quite serious if you do not take precautions. Throughout my trek, I’ve seen people succumb to altitude sickness, including a lady who collapsed in front of my group and had to be immediately evacuated by helicopter.

For acclimatisation day, we aren’t supposed to sleep in to allow the body to acclimatise. So, we toured Namche Bazaar and went up for tea at Everest View Hotel. The view on a clear day allows for spectacular views of Everest and the other peaks along the way. After that, we explored the rest of Namche Bazaar and the cafes it has to offer.

Namche Bazaar, as the name describes, was a bazaar when the Tibetan border with Nepal was open. There was a large bazaar where the Tibetan traders would set up to sell their wares. Namche Bazaar thus served as the largest town/capital of the Khumbu Region. Unfortunately, with the events in China, Namche is no longer as bustling as it once was, but the shops and traders there still have plenty of wares to offer.
Top tip: This is also the last place where you can get anything that you may have missed for the trek at a reasonable price. Beyond Namche, you may have to pay a higher premium for any items, so make sure you get everything you need for the rest of the trek.
Day 6 – Temples – Namche (3,440m) to Tengboche (3,874m)

We started the day with the trek from Namche to Tengboche (3,874m). The trek covers some flowing rivers and spending the time at Tengboche Monastery. Our group received a blessing from the monk who was there at the time, to have a safe journey through the trek. Unfortunately, the usual prayer session did not happen when we were there as the head monk was not around.

We then reached Tengboche and rested for the night. It’s worth noting that after Namche Bazaar, the temperature starts to drop, and we’re looking at temperatures around -1 to 3 degrees Celsius.

Day 7 – Sights of the Himalayas – Tengboche (3,874m) to Dingboche (4,400m)

On Day 7, we hiked from Tengboche to Dingboche (4,400m). It started to get colder, and the terrain began to change to occasional ice. Fortunately, the path never became too icy at this point. However, it was essential to layer up properly.
Day 8 – Hitting 5,000m – Dingboche Acclimatisation (4,400m)
Today’s acclimatisation is essential as we will cross into 5,000m in the next two days. As part of the acclimatisation day, we went up Nagarshan Hill (5,100m). Its peak is the first time we cracked 5,000m. As part of acclimatisation, we had to stay at the peak for about an hour before we could return back to the village.


Once at the village, we spent our time at the fantastic cafes, where the chocolate cake and brewed coffee tasted amazing. In Dingboche, there is also a café with a large TV providing entertainment and free wifi. Dingboche is also the last place you can get a hot shower, so consider that if that’s essential for you. Dingboche, like most villages prior, is amazing but also marks the last point of civilization.


All the tea houses from here onwards are dedicated only for trekkers, so you will not have the comforts of the previous tea houses. Also note that at this point onwards, the cost of water will also increase.
Day 9 – More Majestic Views – Dingboche (4,400m) to Lobuche (4,930m)


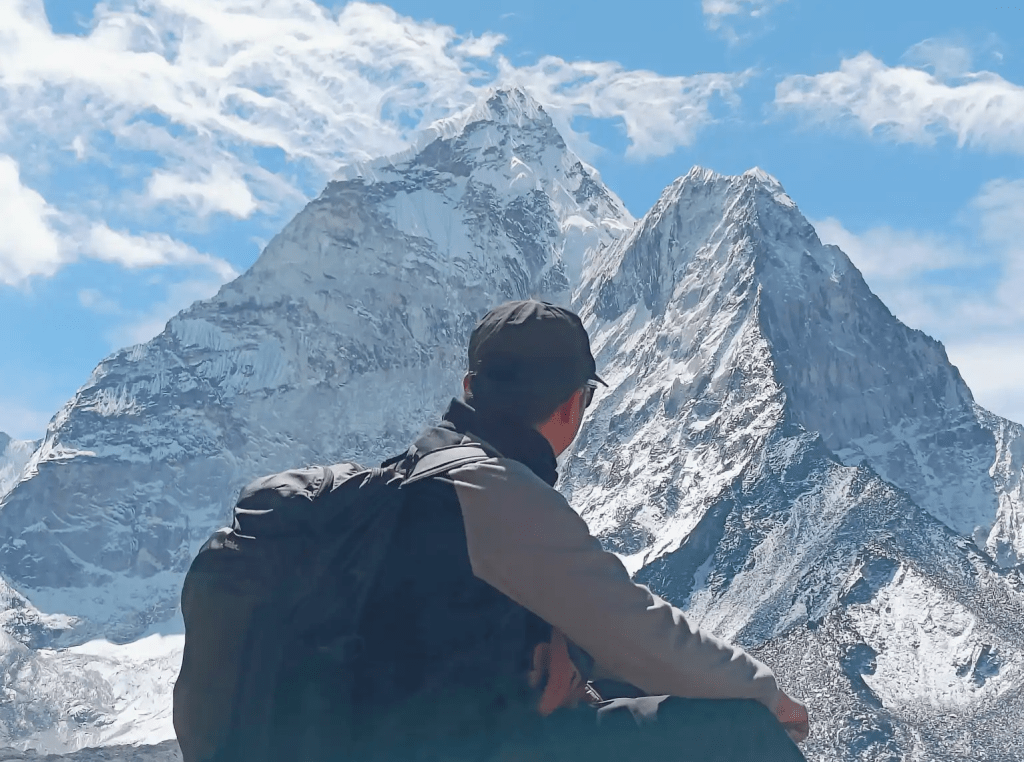
The trek from Dingboche to Lobuche (4,930m) will cross snowy terrain. At this point there were amazing views of the mountains of the Himalayas. As we creep closer to Everest Base Camp, you will get less view of Everest. However, there are plenty of other mountains within the region that are just as majestic, such as Nuptse, Lhotse, and other peaks.

After which we spent the night in Lobuche.
Day 10 – Reaching EBC – Labuche (4,930m) to Gorakshep (5,180m) and EBC (5,364m)

Today was the big day. After a short trek from Lobuche to Gorakshep, we dropped off non-essentials and grabbed lunch. After the meal, we headed onwards to EBC. The trek towards EBC is the pinnacle of the entire trip. The terrain also becomes rocky, requiring some scrambling. The altitude also does take a toll on us.

Eventually, we did it. We reached Everest Base Camp. After spending time taking photos and walking around the camp itself, we then headed back to Gorakshep for the night.
Day 11-14 – (Optional: Hike Up Kala Patthar (5,545m) and Then Descent)
After the main hike up to EBC, you can opt to hike up Kala Patthar. To do that, we would need to wake up early in the morning for the trek to catch the morning sunrise. Do note that it will be very cold in the morning. Make sure to properly layer up with mittens and the like, as frostbite might be possible.

As for us, we decided to sleep in for the night and then begin our descent back to Lukla airport over the next couple of days. As we pass by all the villages we visited earlier, we reminisced about all the memories we created along the way.
At this point, our group split up, with the mountaineers heading to Lobuche Base Camp while the rest of us headed back to Lukla.
Day 15 – Return to Kathmandu

As the key part of the trip ends, we spent the rest of our time exploring Kathmandu. Our guide took us to the famous Monkey Temple and other parts of Kathmandu. Eventually, we said our goodbyes to the guides and made the long journey back home.

Tips & Things to Know Before You Go
- Medication to prevent Acute Mountain Sickness
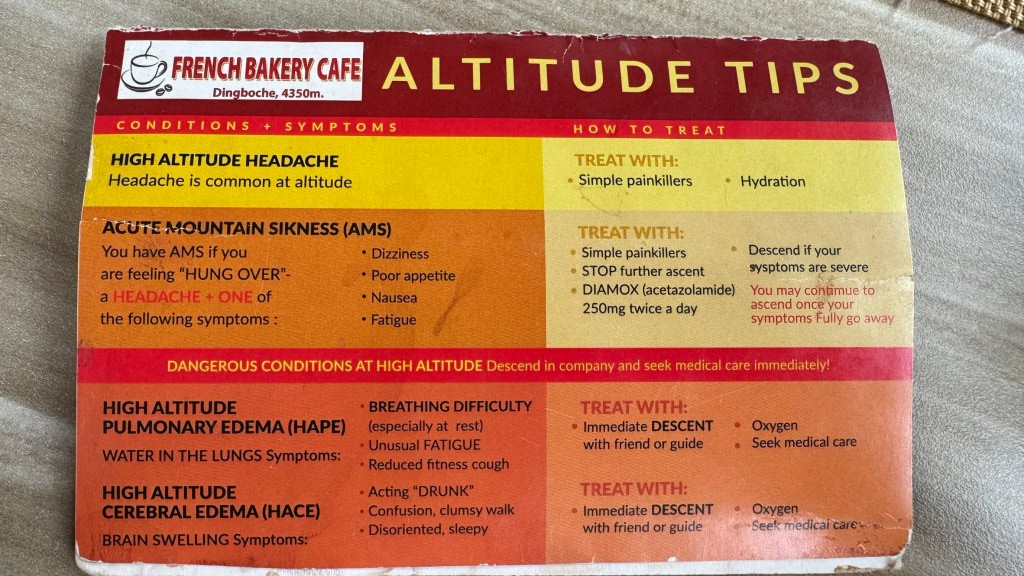
The multi-day hike up to EBC is not a difficult hike, and resting every night at a tea house is much more comfortable than in a tent. However, the major challenge is the altitude. Acute Mountain Sickness (AMS) can be fatal if left untreated for long. The signs can also be masked by other illnesses or fatigue. Diamox is a medication that can be used to prevent AMS; it is only effective when used before the onset of AMS. Once you develop AMS, Diamox is no longer as effective. However, Diamox also has side effects that may cause discomfort. If you have rarely been at high-altitude locations, it’s recommended to take Diamox. However, Diamox is not a magic bullet, and you may still get AMS. Everyone’s body responds differently at altitude.
Since we spend most of our time in Singapore at sea level, in my opinion, it’s safer to just take Diamox. It would be unfortunate to call off the trip which you spent quite a bit of money on and not reach EBC. You can get Diamox in Kathmandu or in Singapore from Guardian. You will need a prescription to purchase it from the pharmacy.
For reference, below is a card that I picked up at the French bakery.

- Packing and luggage
Besides that, for clothes you can purchase most stuff from Decathlon in Singapore before leaving for Nepal. Your porters will carry your duffel bag while you carry a light day bag. It’s important to pack light because the weight limit for your luggage on the plane is 15kg. I brought too many clothes and probably too much snacks. The tea houses are well equipped with food and drinks and at reasonable prices.

- Hygiene essentials
The water is always freezing cold. Hot water showers are not common at tea houses. If they are offered, they almost always come at a cost. I mostly didn’t shower and used dry soap wipes, which you can purchase from Decathlon. You could also use wet wipes, but they are not good for the environment and are heavy.
- Water
Water is important; you can generally purchase bottled water at tea houses easily, but the price increases the higher you go. I recommend buying purification tablets in Kathmandu. If you want to invest in something more long-term, I suggest looking at Epic Water bottles or similar. I use these on my trips within Asia so I don’t spend too much on mineral water, which adds up.
All in all, if you need anything, just inform your guide when you meet him on the first day. If you are on a budget, let him know. He will match the quality of the item to what you are willing to pay for rentals. I rented cold-weather sleeping bags that were clean and warm. I recommend not skimping on this since you will be using it for the next 15 days. Other than that, the rest can be bought or rented, so talk to your guide.
Final Thoughts
Some of the best memories from the trip were actually the time spent with the group. Being surrounded by the amazing Himalayan vistas was made better by the group we were with. The most memorable time I had on the trip was not actually reaching EBC or even the feeling of finally reaching Lukla airport after a long wait. It was actually sipping on freshly brewed coffee and eating a creamy chocolate cake in a comfortable cafe. For a moment, time froze as I enjoyed something luxurious in the middle of a village, far away from the hustle and bustle of the big city, in the Himalayas.

Several months after the trip, I look back fondly on the trip. The hike wasn’t as taxing as I had initially thought, thanks to the spread-out nature of the hike and the comforts offered at the tea houses. As someone who generally spends more time below sea level as opposed to above it, it was an amazing experience and one I would not forget.
I do recommend it, with the caveat that it is not for the faint of heart. Prepare well, the journey can be long and arduous, but it’s one you will not forget. The amazing views and vistas of the Himalayas will keep you company, along with the peers you meet along the way.

Leave a comment